| The following original pictures are public domain from archives NARA, BPR (Air Forces Group) and originate from various internet sources, pictures from the original movie by Bates and Rosenmann originate also from the version of the original movie on the DVD "1945 - Kriegsende in Köln" published by Hermann Rheindorf. |
|
|
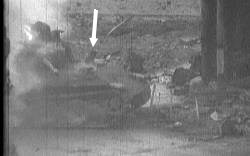
 Fig. 19: Fig. 19:
The soldier in the cupola: the fire seems to burn his torso. Soldier 2 is now behind the Panther, one cannot see him. The tank commander starts to escape to the left side. On the Panther's deck soldier 4 (arrow) appears out of one of the hatches - it seems to be the driver since he is climbing out of the driver's hatch.
| | |
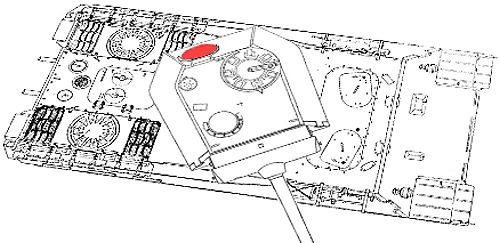
Driver's hatch 
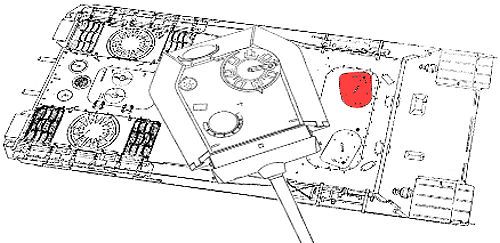
Graph created from two graphs by F. Gruber, "Panzer V Panther" by Spielberger/Doyle, Stuttgart 2010, with friendly permission by Motorbuch Verlag
Driver's hatch
|

Detail picture 4:
The soldier in the cupola. 4 still frames out of a film sequence of several seconds |
|
|
Soldier 3, is he the gunner or the loader ? The white line shows the trajectory of shell #1.
The trajectory (blue dotted line), the bullet (arrow a), loader position (3), gunner position (2), commander position (1)
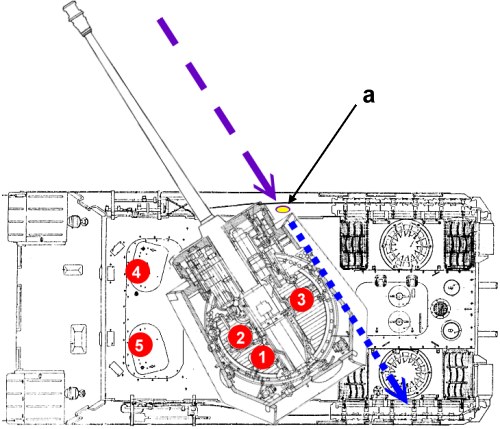
Graph created from two graphs by F. Gruber, from the book "Panzer V Panther" by Spielberger/Doyle, with friendly permission by Motorbuch Verlag, Stuttgart 2010
Since this first shell would have entered the Panther's hull closest to the loader's position it would seem likely that he would have been seriously hurt even if he was not hit directly. But the interior of the tank is very narrow and because of the cannon in the middle of the tank and other components it's not easy to change the position within a few seconds
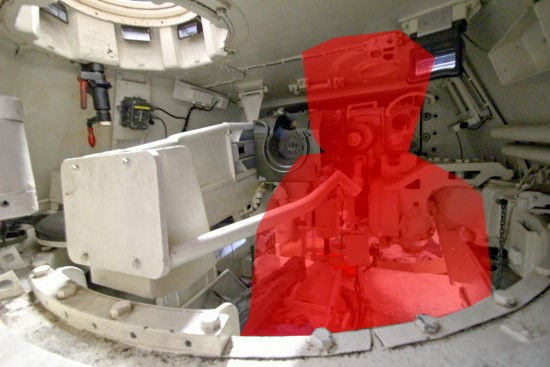
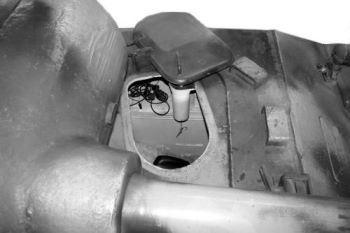
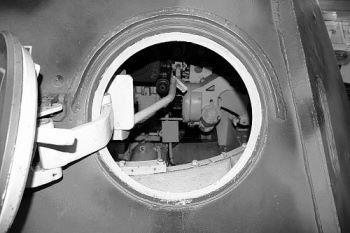
View through the turret's back hatch, the loader's position (Panther shown in Deutsches Panzermuseum Munster).
So it doesn't seem realistic that an seriously injured loader has done it up to the turret of the tank in such a short time but it was possible for him to leave the Panther the fastest through the loaders hatch. The gunner's position in the tank is located directly below the commander's position in the turret
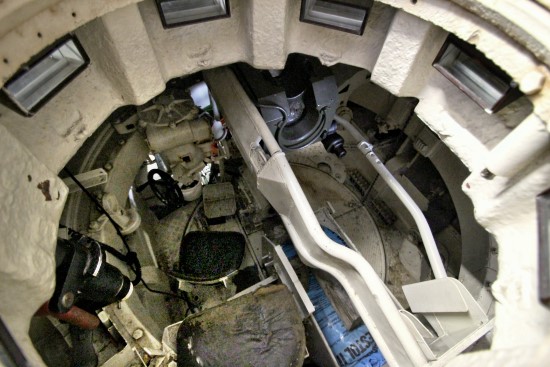
View from above into the turret. At the bottom of the picture you see the commander's seat, below the commanders's seat the gunner's seat. Right side the loader's position.
So the turret was fast and easily accessible especialy for the gunner. In Bates movie we see soldier 3 in the cupola as he heaves himself out of the hatch and he looks seriously injured. So it seems more realistic that we see the gunner in the cupola at this time. |
|
|
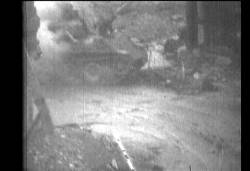
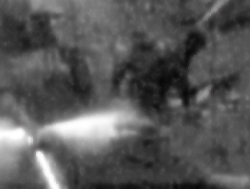
Fig. 20:
At the bottom of the picture the next shell appears (No. 2). Soldier 4 is still climbing out of the driver's hatch, soldier 2 still lies behind the Panther and soldier 1, the tank commander, still runs to the left side, at this moment covered by soldier 4 climbing out of the hatch. The head and left arm of the tank commander are visible behind soldier 4. This concrete situation is interpreted falsely in many movie descriptions where they say the one soldier runs back in order to help the other soldier. |
| 
Fig. 21:
The shell shortly before the impact. Soldier 4 still stepping out of the hatch. Soldier 1, the tank commander, continues fleeing to the left. One can see his head, torso and its left arm. This picture shows that the tank commander is only running away and does not plan to help the other soldiers. He is located already some meters behind the Panther on the ground (only cameraman Bates high point of view let him appear next to soldier 4) and soldier 4 is still located on the Panther's deck. |
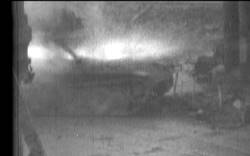
Fig. 22:
The shell hits, the soldier in the cupola is still recognizable as a shade. | | |
Detail picture 5:
Excerpt from Fig. 21. Tank commander running
to the left, soldier 4 still located on
the tank. |
|
| 
Blurred pictures, short interruption of the visual contact.
|
|
|
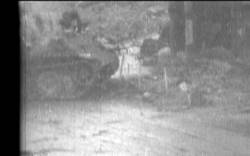
Fig. 23:
After the blurred picture sequence one can see soldier 4 in preparation to jump from the Panther. The tank commander now is out of sight. | | 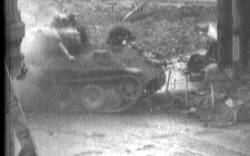
Fig. 24:
Soldier 4 shortly before the jump. Soldier 2 still located behind the Panther, one cannot see him. Soldier 3 in the cupola disappeared. |
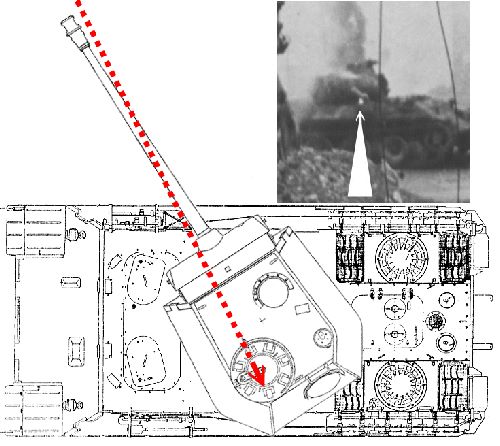
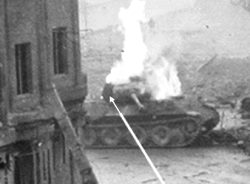
Graph created from two graphs by F. Gruber, from the book "Panzer V Panther" by Spielberger/Doyle, with friendly permission by Motorbuch Verlag, Stuttgart 2010
No chance for soldier 3. He now was at least seriously injured or already dead. His lower legs were shredded by the grenade and he fell back into the burning tank. This graph and photo shows the grenade's trajectory (red dotted line / white arrow) . The soldier stood directly on the way.
|
|
|
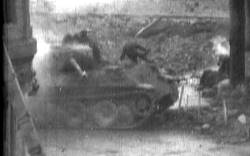
Fig. 25:
Soldier 4 jumps from the Panther. | | 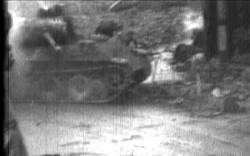
Fig. 26:
While he jumps another soldier behind the Panther stands up, it seems this is soldier 2 who was jumping from the Panther some seconds before. |
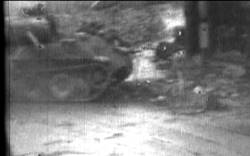
Fig. 27:
Soldier 4 (left) and soldier 2 (right) next to each other. | | 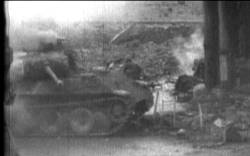
Fig. 28:
Soldier 4 now is located behind the Panther. Soldier 2 continues to straighten up. |
|
|
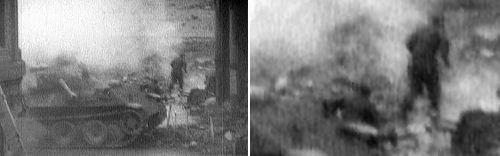
Fig. 29:
Soldier 2 runs away. Soldier 4 just starts running behind him. |
|
|
Blurred pictures, short interruption of the visual contact.
|
|
|
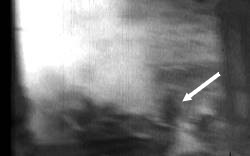
Fig. 30:
The following pictures are only very blurred. One nevertheless can recognize soldier 4 on two frames. He flees to the rear. Soldier 2 is already out of sight at this time. | | 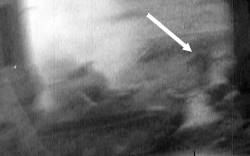
Fig. 31:
One can see soldier 4 only as a locally changing shade. |
|
|
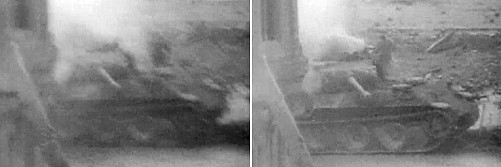
Fig. 32:
An some frames later there's a dark shadow moving next to the cupola. It's another soldier running away, soldier 5. It's probably the loader (following the theory above that soldier 3 was the gunner) who was climbing out of the loader's hatch and now runs toward the cathedral.
|
Loader's hatch
Graph created from two graphs by F. Gruber, "Panzer V Panther" by Spielberger/Doyle, Stuttgart 2010, with friendly permission by Motorbuch Verlag
Loader's hatch
|
|
|
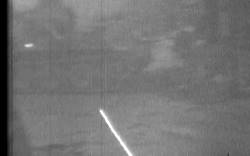
Fig. 33:
Some seconds later the third shell is on the way. | | 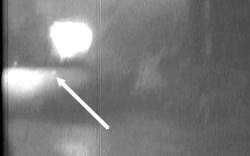
Fig. 34:
A hit. The impact hole is recognizable as small bright point. |
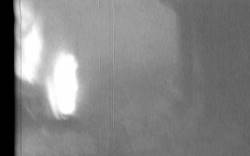
Fig. 35:
Shortly after the impact of the third shell. | | 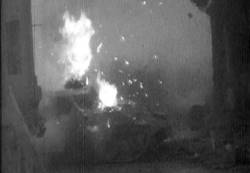
Fig. 36:
The Panther is burning.
|
 | Popup window:
Video showing the firing Pershing and the Panther hit here
|
|
| 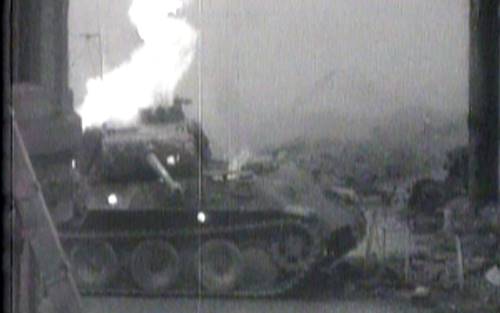
Fig. 37:
The burning Panther with visible impact holes. The small bright point right of the gun is not an impact hole but the optics, one can see the fire inside the tank shining through. The second shell hit underneath the turret is covered almost completely by the gun.
Now following about 30 seconds scenes of the burning Panther.
|
 | |
|
Conclusion |
|
In the 16 seconds short movie sequence 4 soldiers - tank commander, driver, radio operator and probably the loader - can be observed debarking successfull from the tank.
The soldier in the turret in the midst of the flames (fig. 16 and following pictures) probably could not leave the Panther and died. The second hit sure had severed his legs. He looks already more dead than alive on this pictures before the hit. Three Panther crew members were found later in the close military hospital of the cathedral shelter, one of them died later. |


 took place, this page could be a little help for you. Here I have created a little